
Custom trim gives a room its finished edges: the transition from wall to floor, the frame around a doorway and the detail at the ceiling. A successful trim package connects those pieces to the home’s architecture and daily use. For a Florida renovation, material suitability, existing conditions and the order of work deserve as much attention as the profile itself.
Updated October 15, 2026 · MDI Custom Homes LLC · Florida Certified Building Contractor CBC1267559
1. Understand what each trim component does
Baseboard finishes the wall-to-floor junction. Casing frames doors and windows. Crown molding finishes the wall-to-ceiling transition. Panel molding forms decorative shapes on a wall, while wainscoting describes a treatment across the lower portion of a wall. These elements can be restrained or elaborate without changing their basic roles.
Start with the rooms that matter most rather than selecting every available detail. A living room might benefit from a coordinated baseboard, casing and crown package. A contemporary kitchen may need simpler profiles that sit comfortably beside flat-panel cabinetry. Decorative wall frames can add rhythm to a hallway, but their layout must account for doors, switches and furniture.
When trim is part of a whole-home renovation, decide which details repeat throughout the home and where a room deserves a deliberate variation.
2. Test proportions and transitions in the actual room
There is no single correct molding width for every ceiling height. Review wall height, doorway scale, available wall space, furniture and the depth of neighboring finishes together. A profile that looks balanced in an isolated photograph can look crowded beside a narrow door opening or heavy next to a small cabinet.
Use a physical sample or a small mockup at a representative corner. For wall panel layouts, draw or tape the proposed arrangement before fabrication. Check the pattern from the main entry and from the normal seating position, not only from directly in front of one wall.
- Check how baseboards meet door casings; identify any planned plinth blocks or other transition details.
- Resolve crown terminations at openings, beams, soffits and cabinet runs.
- Coordinate panel spacing with outlets, switches, sconces and built-ins.
- Confirm that door swings, drawers and equipment access remain clear.
For an interior reconfiguration, finalize the openings and room layout before approving the trim elevations.
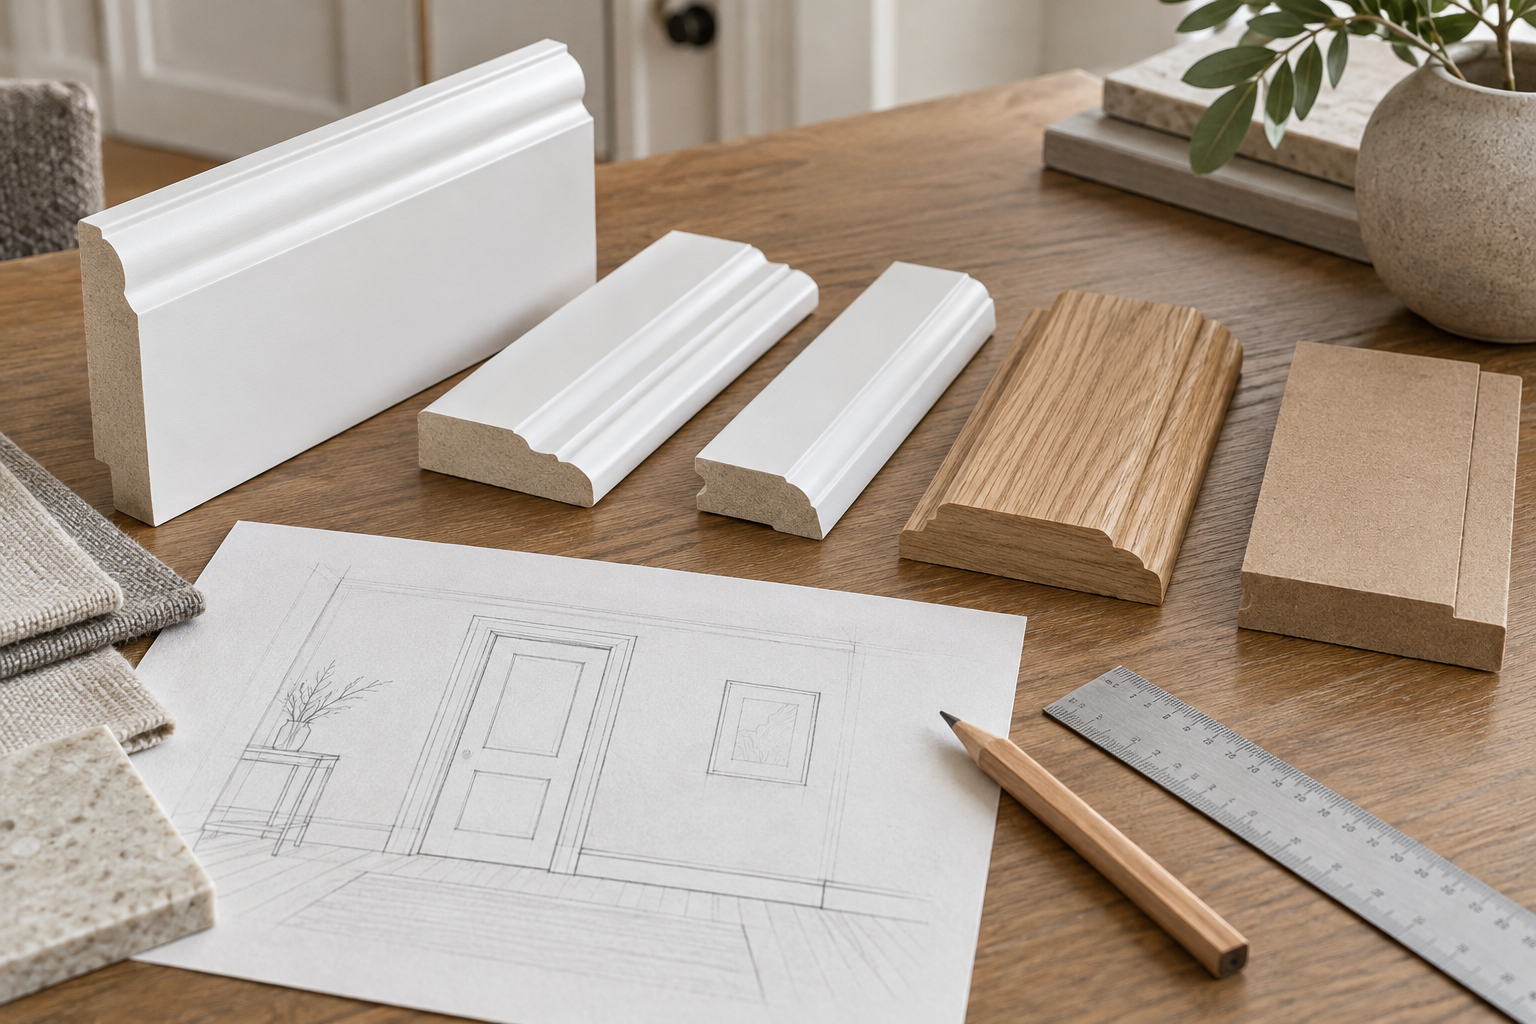
3. Compare materials by application, not by a blanket label
Solid wood
Wood is a natural choice when the visible grain is part of the design. Species, grain variation and the proposed finish should be reviewed together using actual samples. Wood exchanges moisture with the surrounding air, and changes in moisture content affect its behavior. The US Forest Service Wood Handbook explains this relationship. Storage, conditioning and installation planning should suit the selected product and room.
Paint-grade MDF
MDF offers a consistent surface for painted trim, but the product specification matters. Standard MDF and a moisture-resistant MDF are not interchangeable descriptions. For example, Roseburg specifies Medex as an MR50 moisture-resistant MDF for applications including trim in humid or high-moisture interiors. That rating should not be generalized to every MDF product or treated as permission for any water exposure. Confirm the chosen product’s intended use and finishing requirements.
Cellular PVC
PVC can be considered where its product specifications suit the exposure, but it needs its own installation details. AZEK explains that PVC moves with temperature changes, unlike the moisture-driven movement associated with wood. Use the actual manufacturer’s instructions for fastening, joints, adhesives and coatings; wood details should not simply be copied onto PVC.
Selection rule: identify the exact manufacturer, material, profile and approved application in the scope. “Moisture resistant” is not a complete specification.
4. Separate humid air, splashing and an active leak
A conditioned living room, a bathroom vanity wall and an exterior doorway are different environments. The fact that a home is in coastal Pinellas County does not make every trim location equally exposed. Discuss the actual conditions at each location, including cleaning practices, splashing, condensation and any history of water entry.
Swollen baseboards, staining or recurring joint damage deserve investigation before replacement. New molding can conceal evidence without resolving the cause. Document any needed repair separately from the decorative work so the proposal does not assume that changing the visible trim solves the underlying condition.
During bathroom remodeling, coordinate trim with the planned tile edges, ventilation, plumbing and wet-area construction. A decorative molding product is not a substitute for the room’s required water-management details. Keep material approval tied to the specific location and product instructions.
5. Decide the finish and matching strategy before ordering
Painted and stained trim require different selection decisions. For paint, approve the color, sheen and surface preparation expectations. For stain, review the wood species and the finished sample; natural grain and color variation will remain part of the result. Review samples under the room’s daylight and evening lighting.
If some existing trim will remain, measure its profile, thickness and projection instead of relying on a product name alone. A close match in a catalog may still produce an obvious difference where old and new meet. Decide whether to match, replace an entire connected run or introduce an intentional transition.
In a custom kitchen, coordinate molding with cabinet crown, end panels, appliance clearances and ceiling conditions. Confirm which pieces come from the cabinet supplier and which belong to the finish-carpentry scope. That responsibility is easy to miss when two proposals use different terminology.
6. Define the full scope and sequence of work
A molding price is difficult to compare when it covers only material and installation. A complete discussion should address removal, protection, wall repair, material delivery, carpentry, surface preparation, finishing and cleanup. Identify who moves furniture and whether work will happen room by room in an occupied home.
The sequence depends on the floor system, wall work, cabinetry and finish plan. Confirm finished-floor heights and required movement clearances with the relevant product instructions. Coordinate trim so it does not interfere with flooring movement, equipment access or the intended operation of doors and drawers. Avoid assuming that every project follows the same order.
- List rooms and components, with measured quantities or clearly defined limits.
- Record product names, profile dimensions and the approved sample.
- Describe corners, returns, joints and transitions that need special attention.
- Identify repair allowances and exclusions for concealed conditions.
- Assign painting, caulking, filling and touch-up responsibilities.
- Document how substitutions or added work will be approved.
Carry those decisions into scope definition and cost control and the project schedule. Custom fabrication, curved work, stain matching and extensive wall correction can affect both cost and timing.

7. Review the result as a complete interior
At the walkthrough, compare the installed work with the approved sample and scope. Review profile consistency, planned reveals, transitions, joints, finish coverage and visible damage. Check the overall composition from the room’s normal viewpoints as well as individual details. Open nearby doors, cabinets and drawers to confirm that the trim does not interfere with their use.
Record remaining items and who will address them. Keep the finish colors, sheen, product information and care instructions with the project closeout records. Those details make later touch-ups and additions easier to coordinate.
MDI Custom Homes LLC, Florida Certified Building Contractor CBC1267559, plans high-end remodeling and interior customization in Seminole, Largo and the surrounding Pinellas County area. Trim can be coordinated with kitchens, bathrooms, custom storage and larger renovations so the finished details support the whole design. Discuss your rooms, priorities and existing conditions to establish the right scope.
Custom trim questions
What is the difference between crown molding and casing?
Crown molding finishes the junction between a wall and ceiling. Casing frames a door or window opening. They can share a design style while serving different locations and requiring different transitions.
Is MDF suitable for every room in a Florida home?
Suitability depends on the exact product and exposure. Standard MDF and moisture-resistant MDF are different specifications. Check the manufacturer’s intended application and finishing requirements, particularly near moisture.
Should all trim in a house match?
A consistent profile family can connect adjoining rooms, but exact repetition is not always necessary. Plan intentional transitions and coordinate the scale, finish and detailing so changes look deliberate.
Can new molding fix swollen or stained baseboards?
Replacement addresses the visible material only. Investigate the moisture source or other underlying condition before installing new trim, and include any required repair in the project scope.
Bring your project into focus.
Tell MDI Custom Homes what you want to improve, what you want to keep and what matters most. We can discuss the scope and next planning steps for your Pinellas County home.
Discuss your renovation ↗Call 727-213-7309Official resources
- US Forest Service: moisture relations and physical properties of wood
- Roseburg: Medex moisture-resistant MDF specifications
- AZEK: material movement and installation differences for PVC and wood trim
Use the current official guidance and project-specific requirements when planning the work.
Design imagery is illustrative and does not depict completed MDI projects.
